Prerequisites
- Flutter SDK:
>=3.35.0
- Dart SDK:
>=3.0.0 <4.0.0
Create a Flutter app (if needed)
If you don’t already have a Flutter app, create one and navigate into it:
flutter create stac_demo
cd stac_demo
Sign up
The first thing you’ll need to do is sign up for a Stac account. It’s free and only takes a few seconds.
To create an account, head over to our Console and sign in with Google: console.stac.dev.
Install Stac CLI
The Stac CLI helps you scaffold projects, manage screens, and deploy to Stac Cloud.
Open your terminal and run:curl -fsSL https://raw.githubusercontent.com/StacDev/install/main/install.sh | bash
Open PowerShell and run:irm https://raw.githubusercontent.com/StacDev/install/main/install.ps1 | iex
Login to Stac
Run the login command. This opens your browser to authenticate with Google.
Initialize Stac in your project
From your Flutter app directory, initialize Stac:
You’ll be prompted to select an option. You can either choose to use an existing project or create a new one.
stac_demo % stac init


           ######   ########    ####      ######
          ##    ##     ##      ##  ##    ##    ##
          ##           ##     ##    ##   ##
           #####       ##     ########   ##
                ##     ##     ##    ##   ##
          ##    ##     ##     ##    ##   ##    ##
           ######      ##     ##    ##    ######


[INFO] Initializing Stac project in this directory:
 /Users/StudioProjects/stac_app/stac_demo
? Please select an option: ›
❯ Use an existing project
  Create a new project
  Don't set up a default project
stac demo and press enter.
✔ Please select an option: · Create a new project
✔ Enter project name: · stac demo
✔ Enter project description (optional): ·
[INFO] Initializing project: stac demo
If you are not sure about other options, you can always hit enter to choose the default option.
[SUCCESS] ✓ Project initialized successfully!
[INFO] Next steps:
[INFO]   1. Add your Stac widgets definitions to /stac
[INFO]   2. Run "stac build" to convert Dart to JSON
[INFO]   3. Run "stac deploy" to deploy to cloud
stac init will add the following to your project:
stac/hello_world.dart – A Hello World example widget. All your Stac widgets live in the stac folder.- Adds
stac to your pubspec.yaml.
- Creates
default_stac_options.dart, which defines your StacOptions (e.g., project name and ID).
Head over to stac/hello_world.dart and build the widget. Use the @StacScreen annotation to mark the widget as a screen.
import 'package:stac/stac_core.dart';

@StacScreen(screenName: 'hello_world')
StacWidget helloWorld() {
  return StacScaffold(
    body: StacCenter(child: StacText(data: 'Hello, world!')),
  );
}
Scaffold, use the StacScaffold widget.
Now that we have our widget built, we can deploy it to Stac Cloud.
This finds all widgets in the stac folder, builds them, and deploys them to Stac Cloud.
stac_demo % stac deploy
[INFO] Building project before deployment...
[INFO] Building Stac project...
[INFO] Source directory: stac
[INFO] Output directory: stac/.build
[INFO] Found 1 .dart file(s) to process
[INFO] Found 1 @StacScreen annotated function(s) in stac/hello_world.dart
[INFO] ✓ Generated: hello_world.json
[SUCCESS] ✓ Build completed successfully!
[INFO] Processed 1 function(s) and generated JSON files
[INFO] Build completed. Starting deployment...
[INFO] Deploying screens to cloud...
[INFO] Uploading: hello_world.json
[SUCCESS] ✓ Uploaded: hello_world.json
[SUCCESS] ✓ Deployment completed successfully!
[INFO] Deployed 1 file(s)
Initialize Stac
Now that your project is set up, open main.dart and initialize Stac.
import 'package:stac_demo/default_stac_options.dart';
import 'package:flutter/material.dart';
import 'package:stac/stac.dart';

void main() async {
  await Stac.initialize(options: defaultStacOptions);
  runApp(const MyApp());
}
hello_world screen using the stac widget.
Stac(routeName: 'hello_world'),
import 'package:example_app/default_stac_options.dart';
import 'package:flutter/material.dart';
import 'package:stac/stac.dart';

void main() async {
  await Stac.initialize(options: defaultStacOptions);

  runApp(const MyApp());
}

class MyApp extends StatelessWidget {
  const MyApp({super.key});

  @override
  Widget build(BuildContext context) {
    return MaterialApp(
      title: 'Flutter Demo',
      theme: ThemeData(
        colorScheme: ColorScheme.fromSeed(seedColor: Colors.deepPurple),
      ),
      home: const Stac(routeName: 'hello_world'),
    );
  }
}
 When you make changes in
 stac/hello_world.dart, run stac deploy and your app will update instantly — no App Store or Play Store approvals needed.
Stac Cloud
Open the Stac Cloud dashboard to see your deployed screen: console.stac.dev.
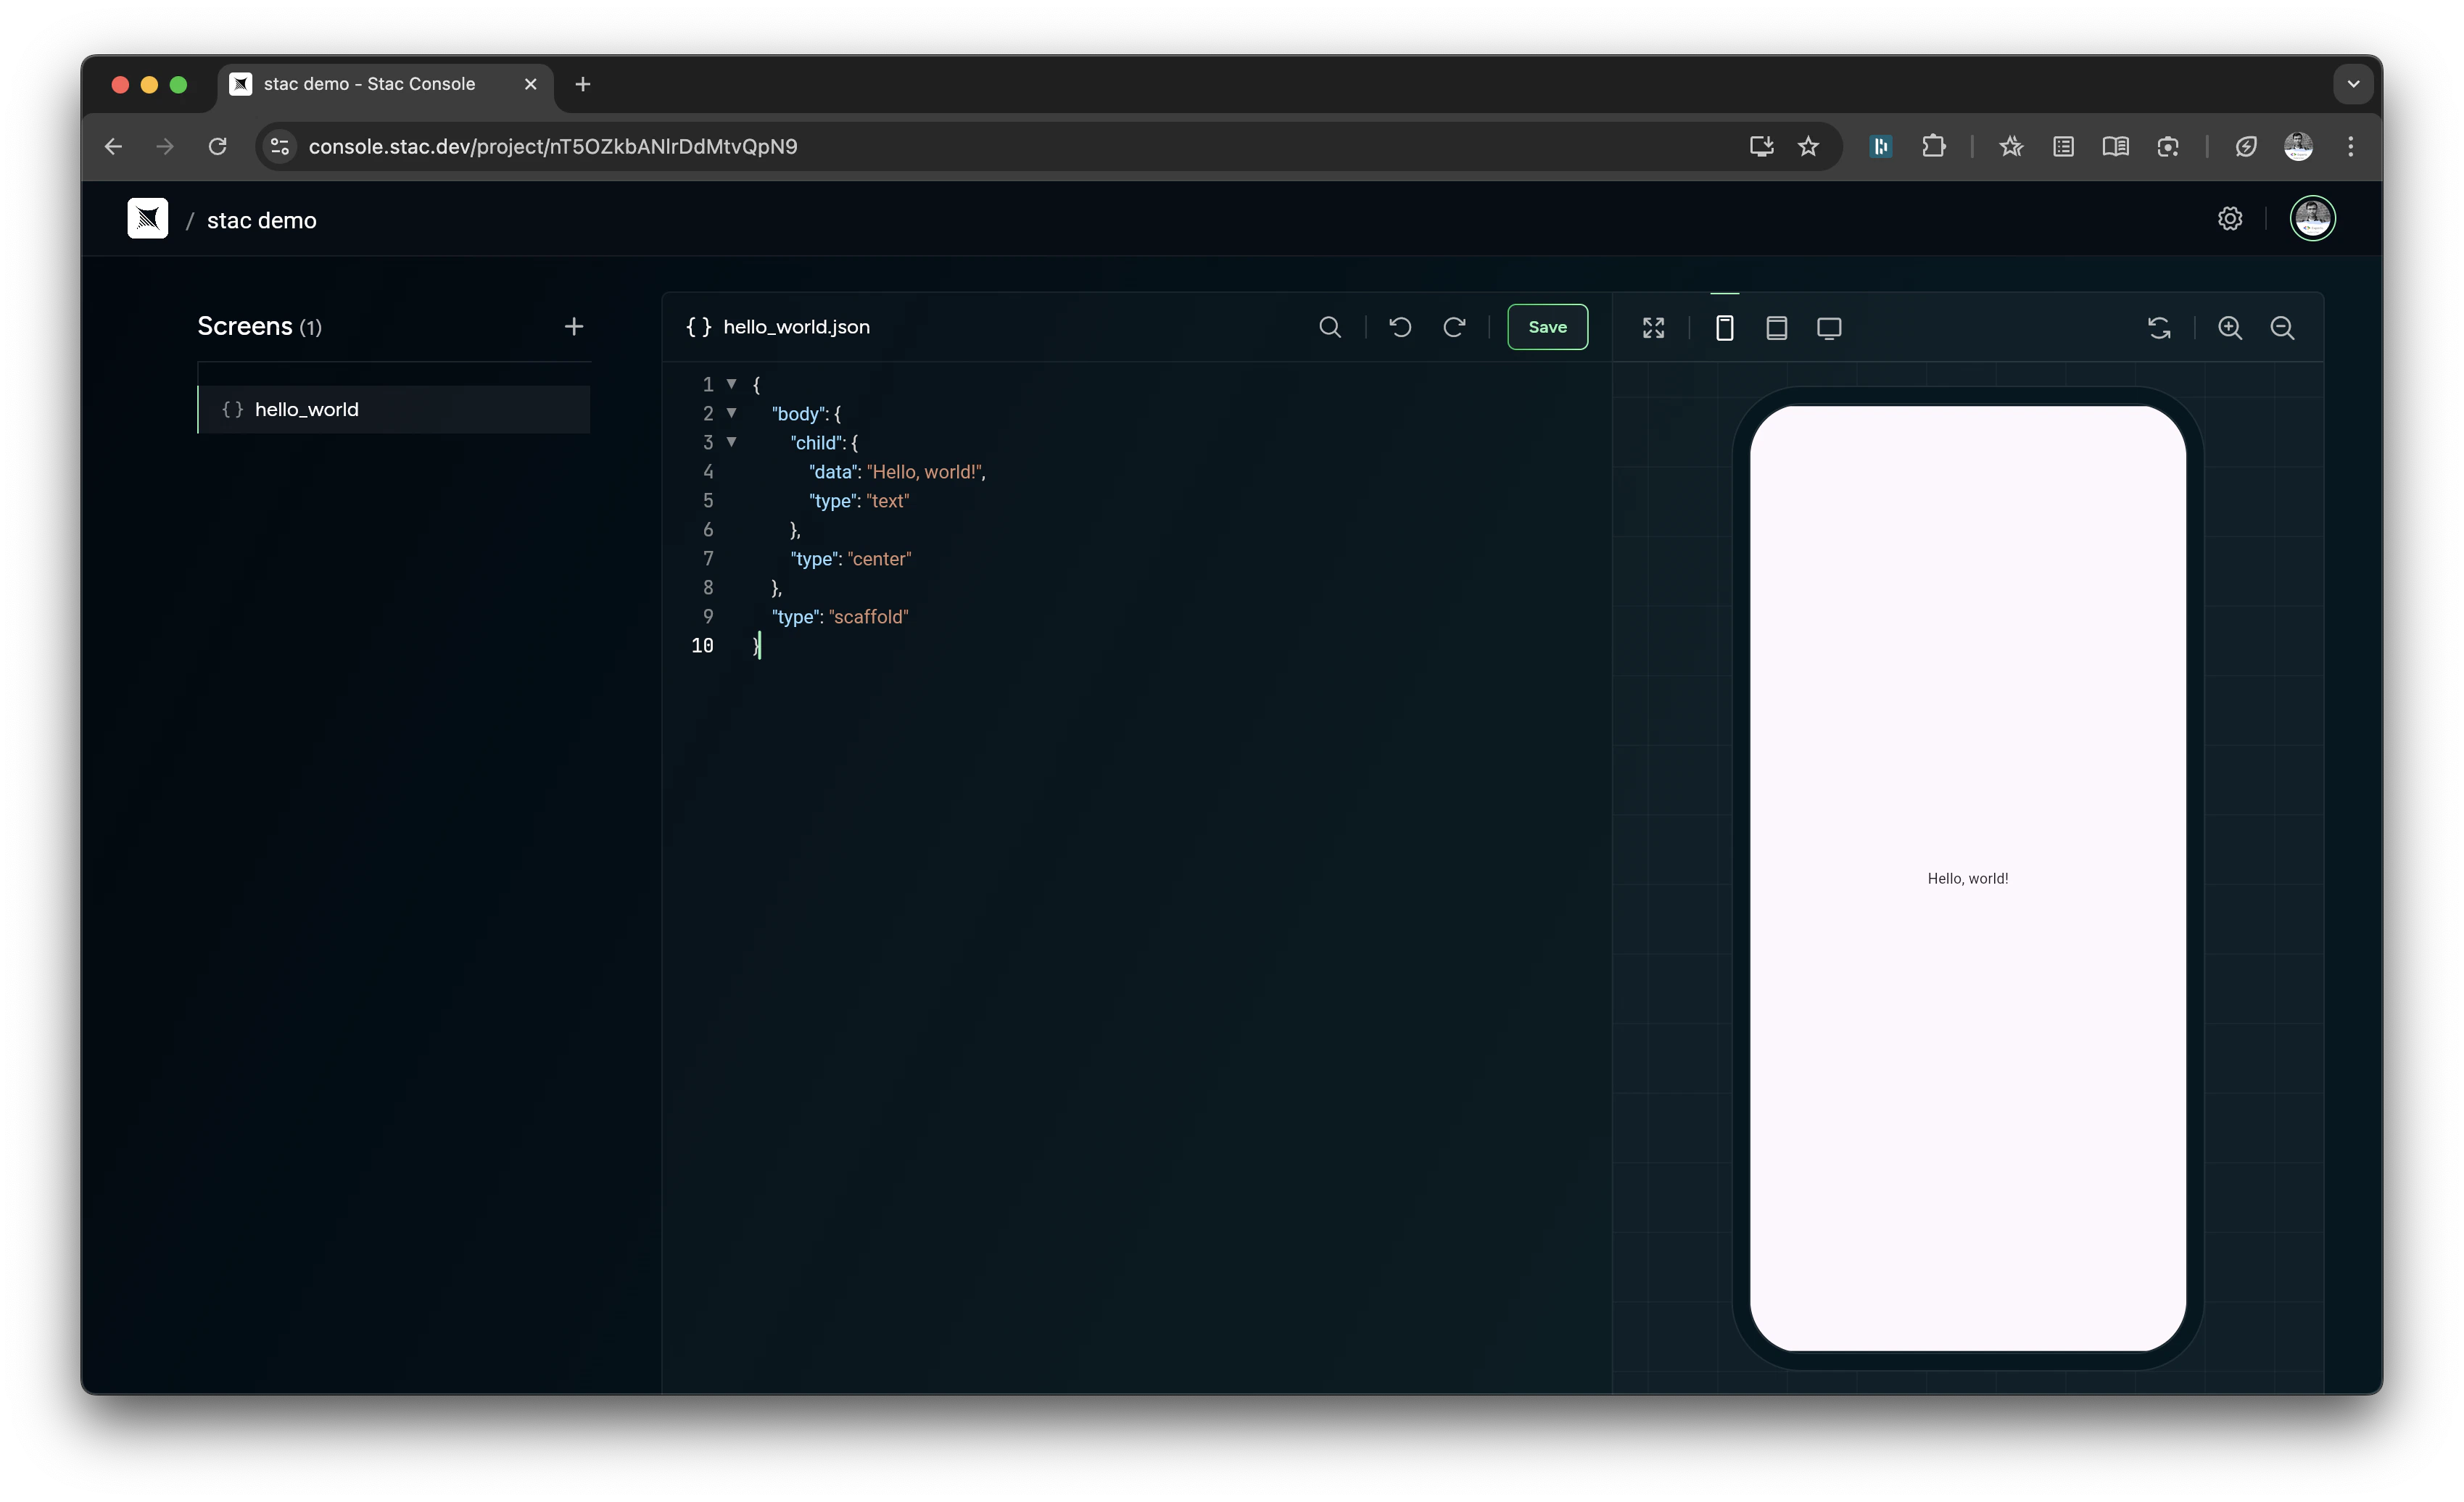
Verification: After deploying, run your app. You should see the hello_world screen. In the Console, the screen appears under your project’s Screens list.
You’re all set. Next, explore widgets and actions, or jump into the CLI guide:
Need help? Join the community on Discord or open an issue on GitHub.